
Getting Started
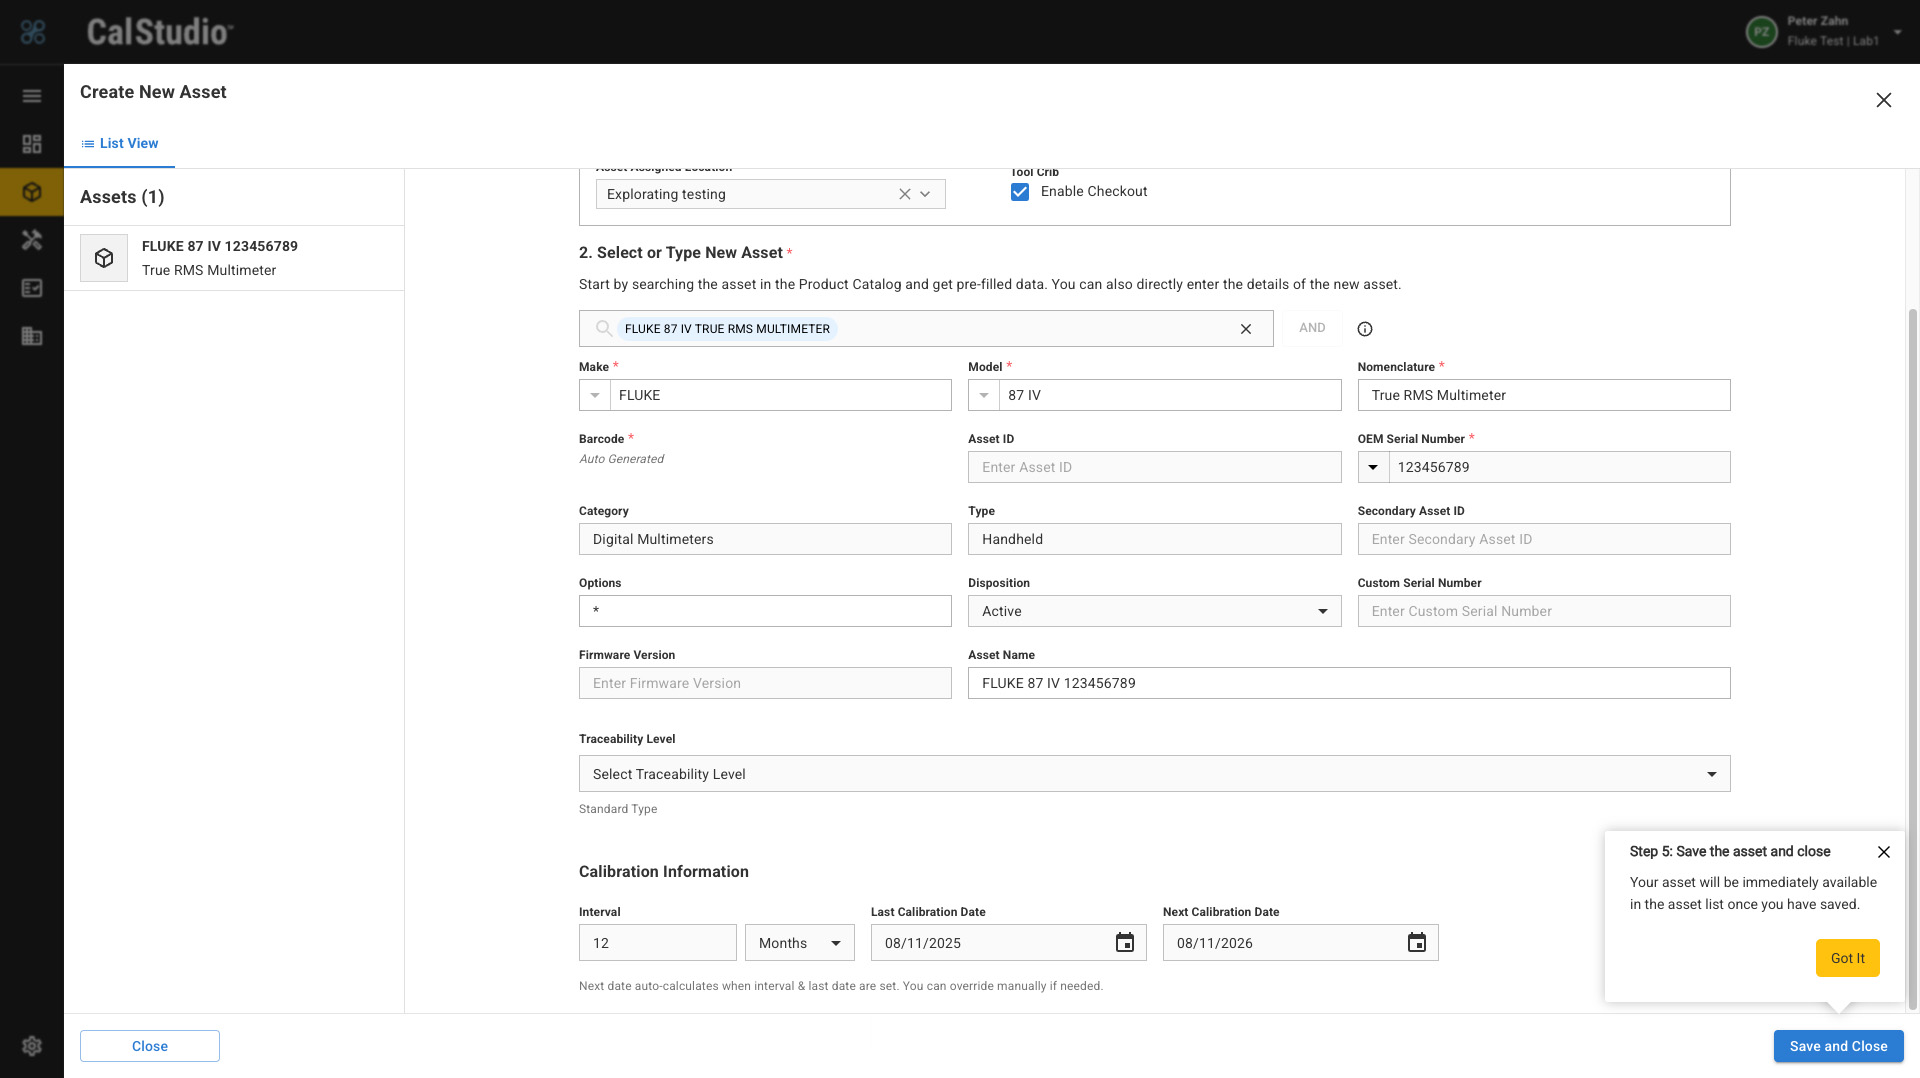
Assets are a specific instance of a product, device, or piece of Measuring and Test Equipment (M&TE) with an assigned owner. Assets are created via the Asset Creation Dialog screen in CalStudio which can be accessed several ways:
-
Assets Tab List View > Create New Asset button
-
Company Tab > Organization > Summary Tab > + Add New Asset button
-
Company Tab > Organization > Assets Tab > + Add New Asset button
Roles associated with asset creation/editing are:
-
Creator: Can create new assets.
-
Editor: Can edit existing assets.
-
Custodian: Creates and manages assets for a non-lab organization.
Use this quick guide to get started. Completion time is approximately 1-2 mins.
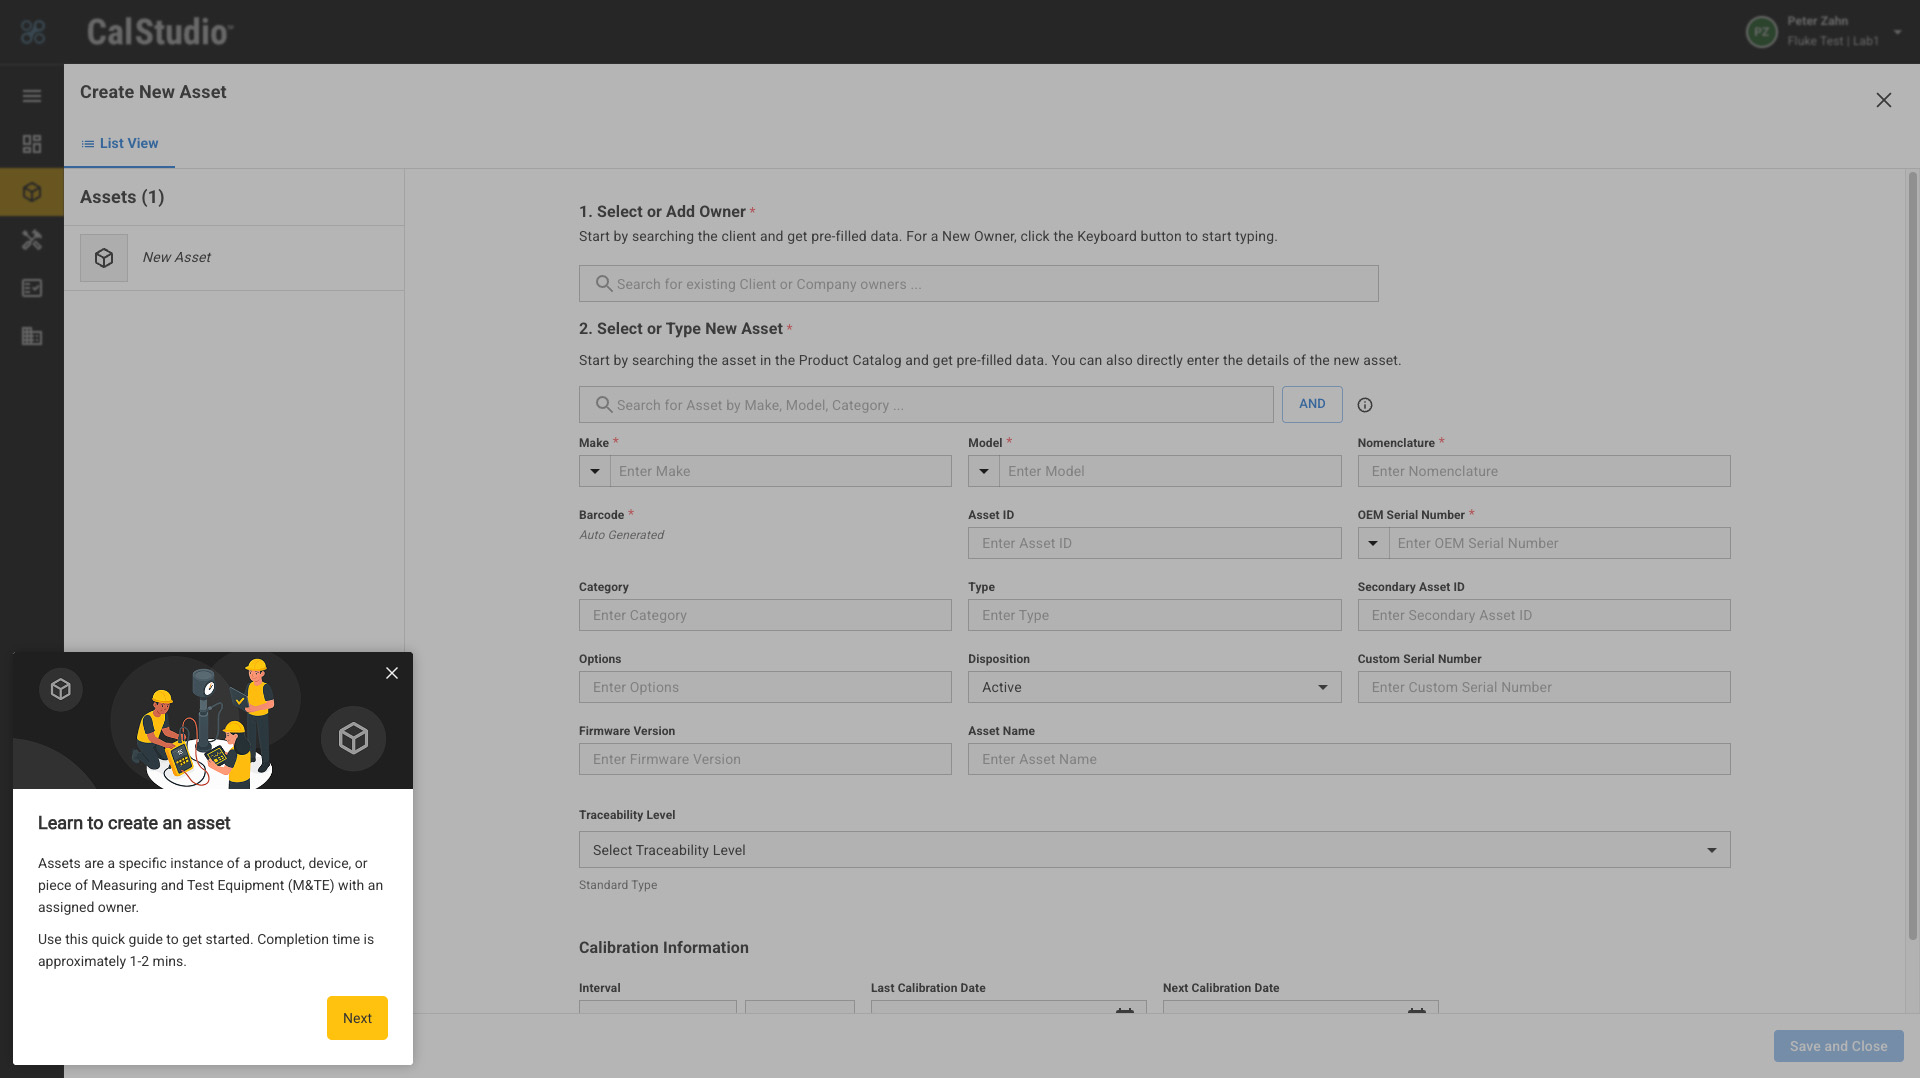
Step 1: Select the asset owner
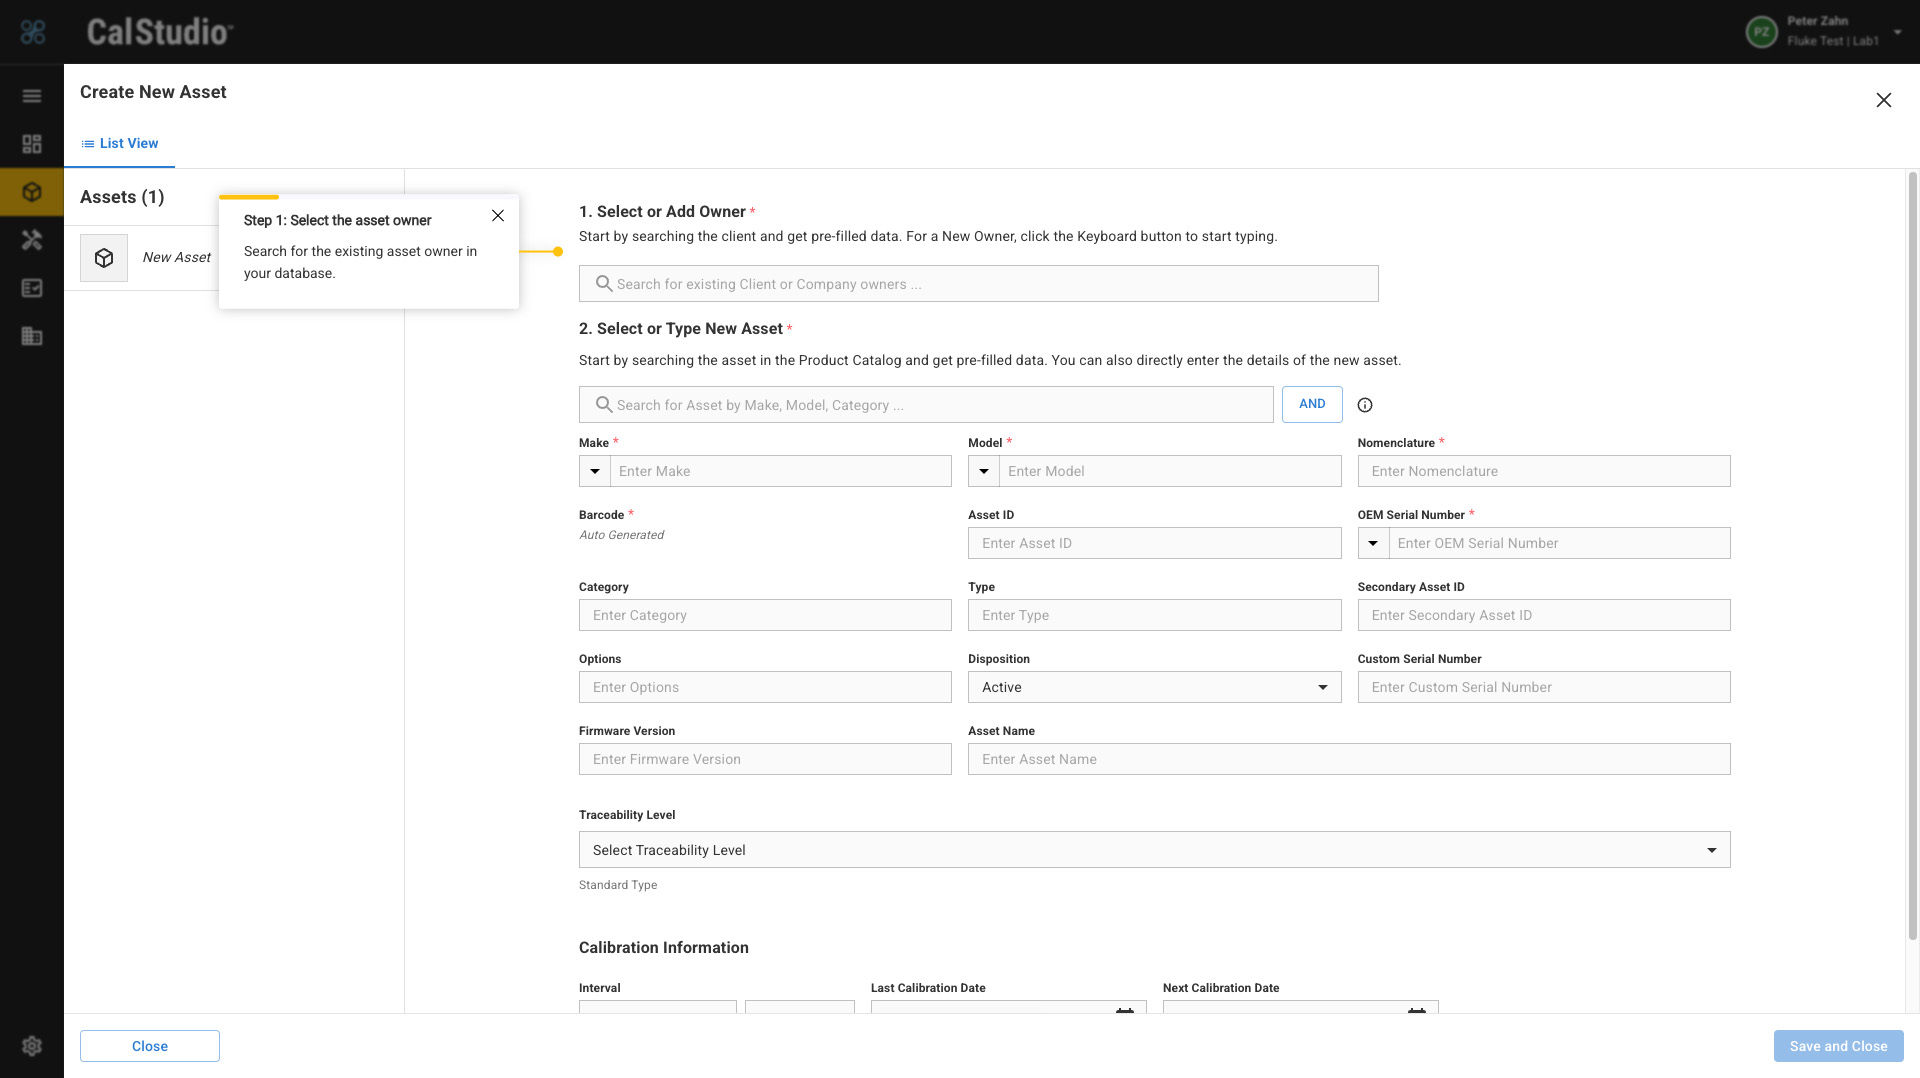
Search for the existing asset owner in your database. Select the Asset Assigned Location (if applicable) and set Tool Crib checkout access.
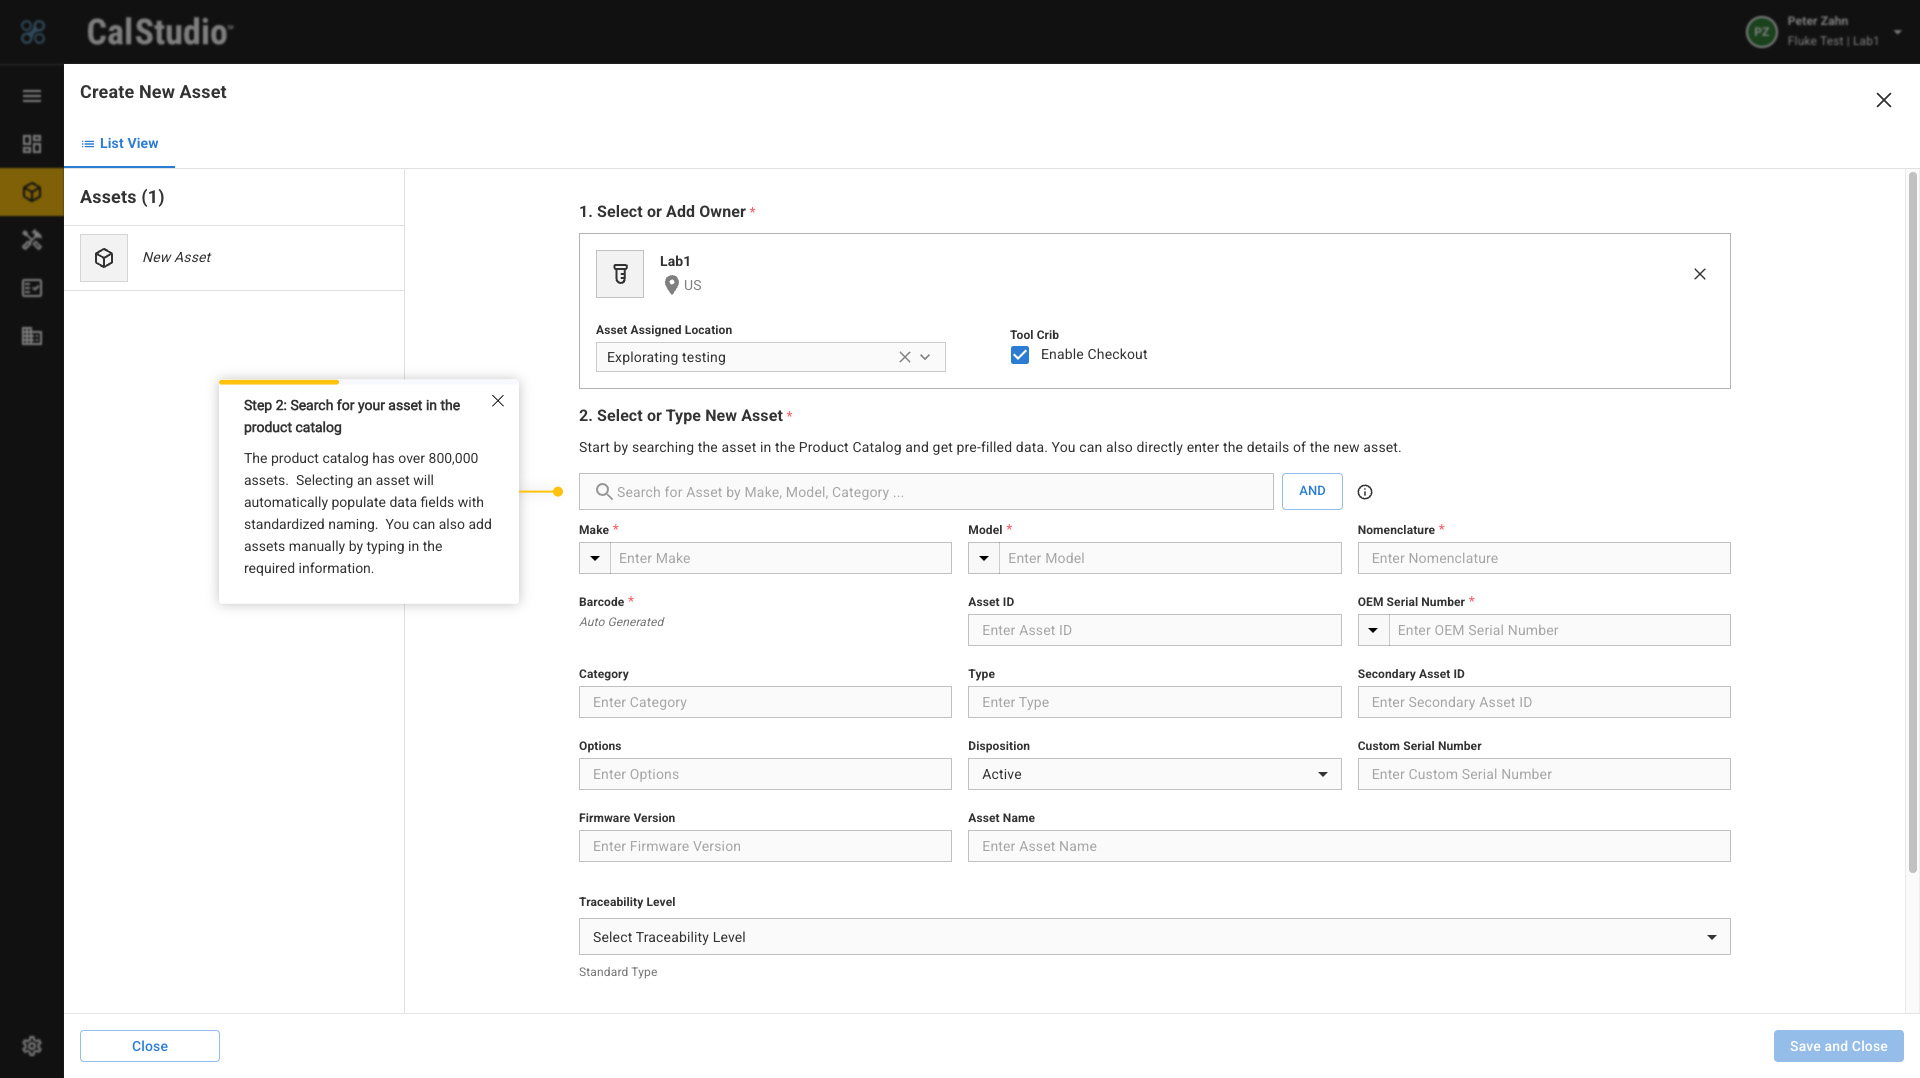
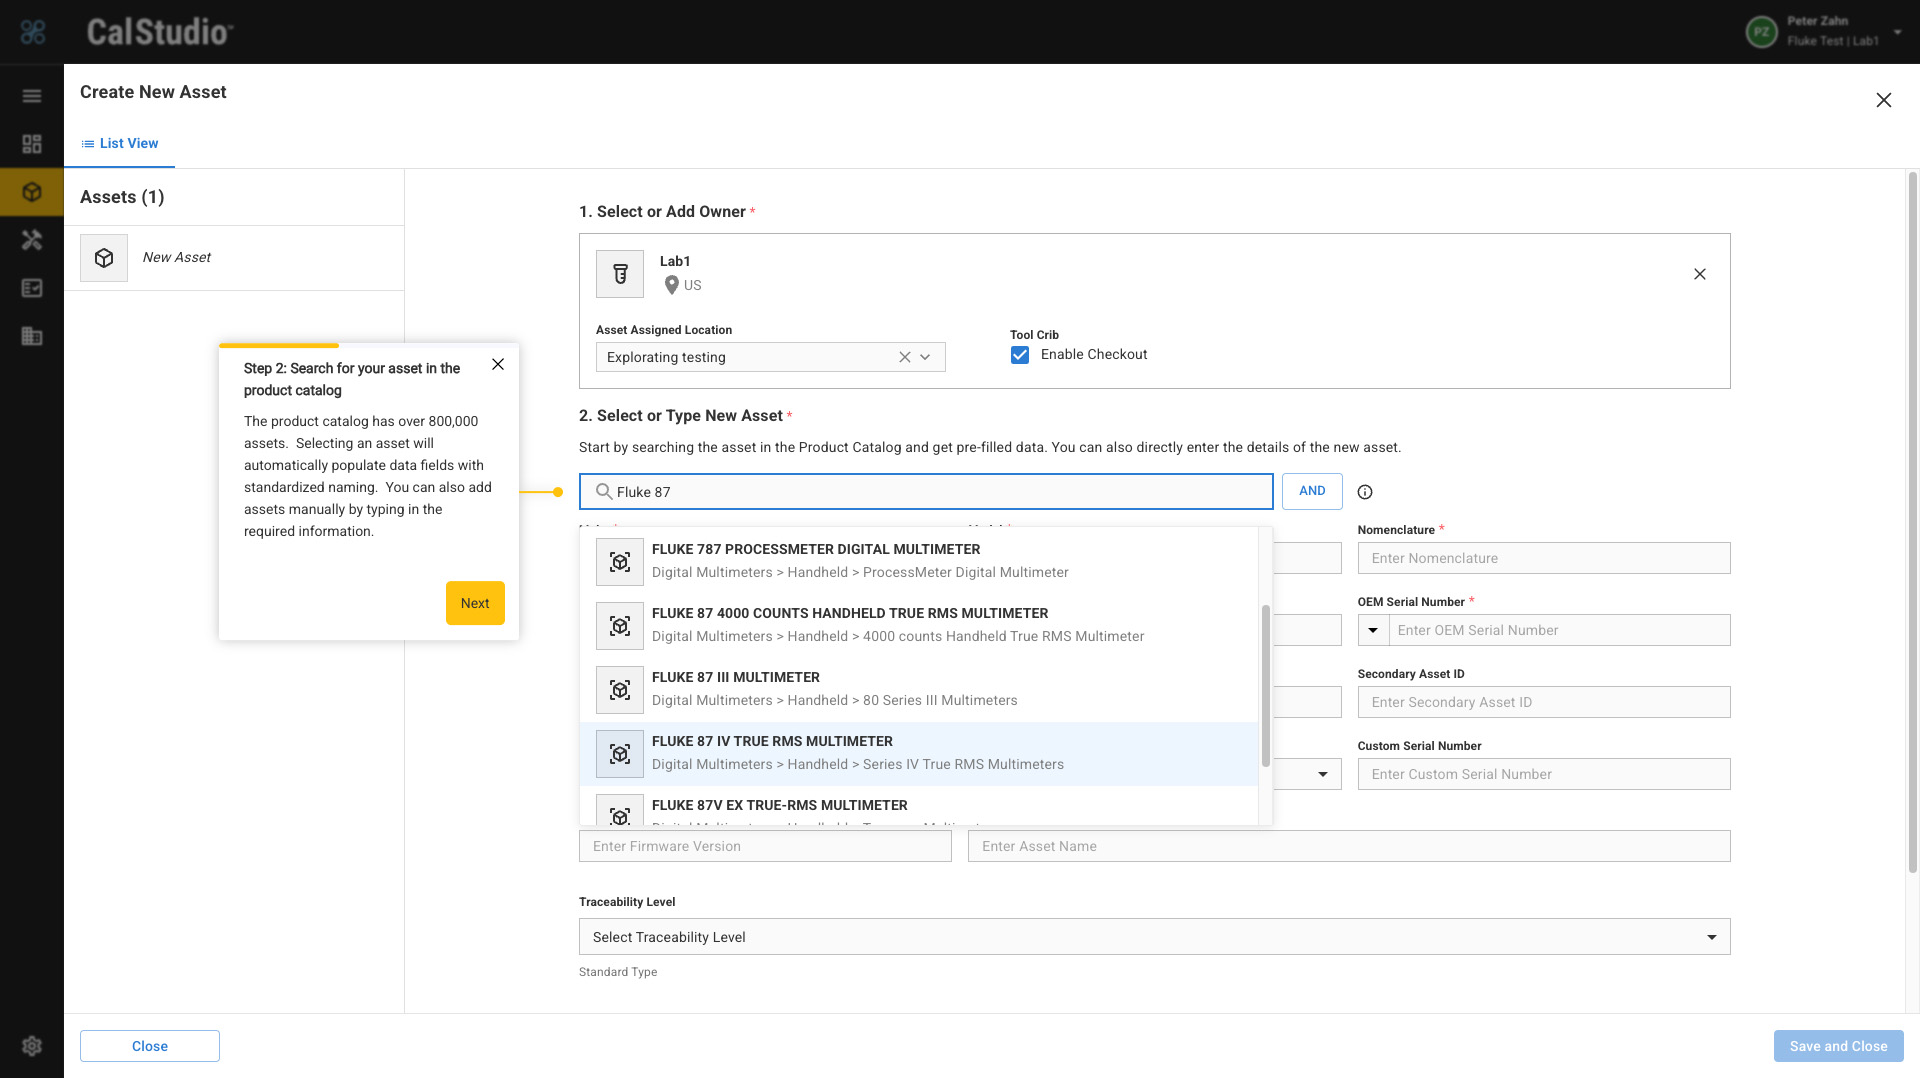
Step 2: Search for your asset in the product catalog
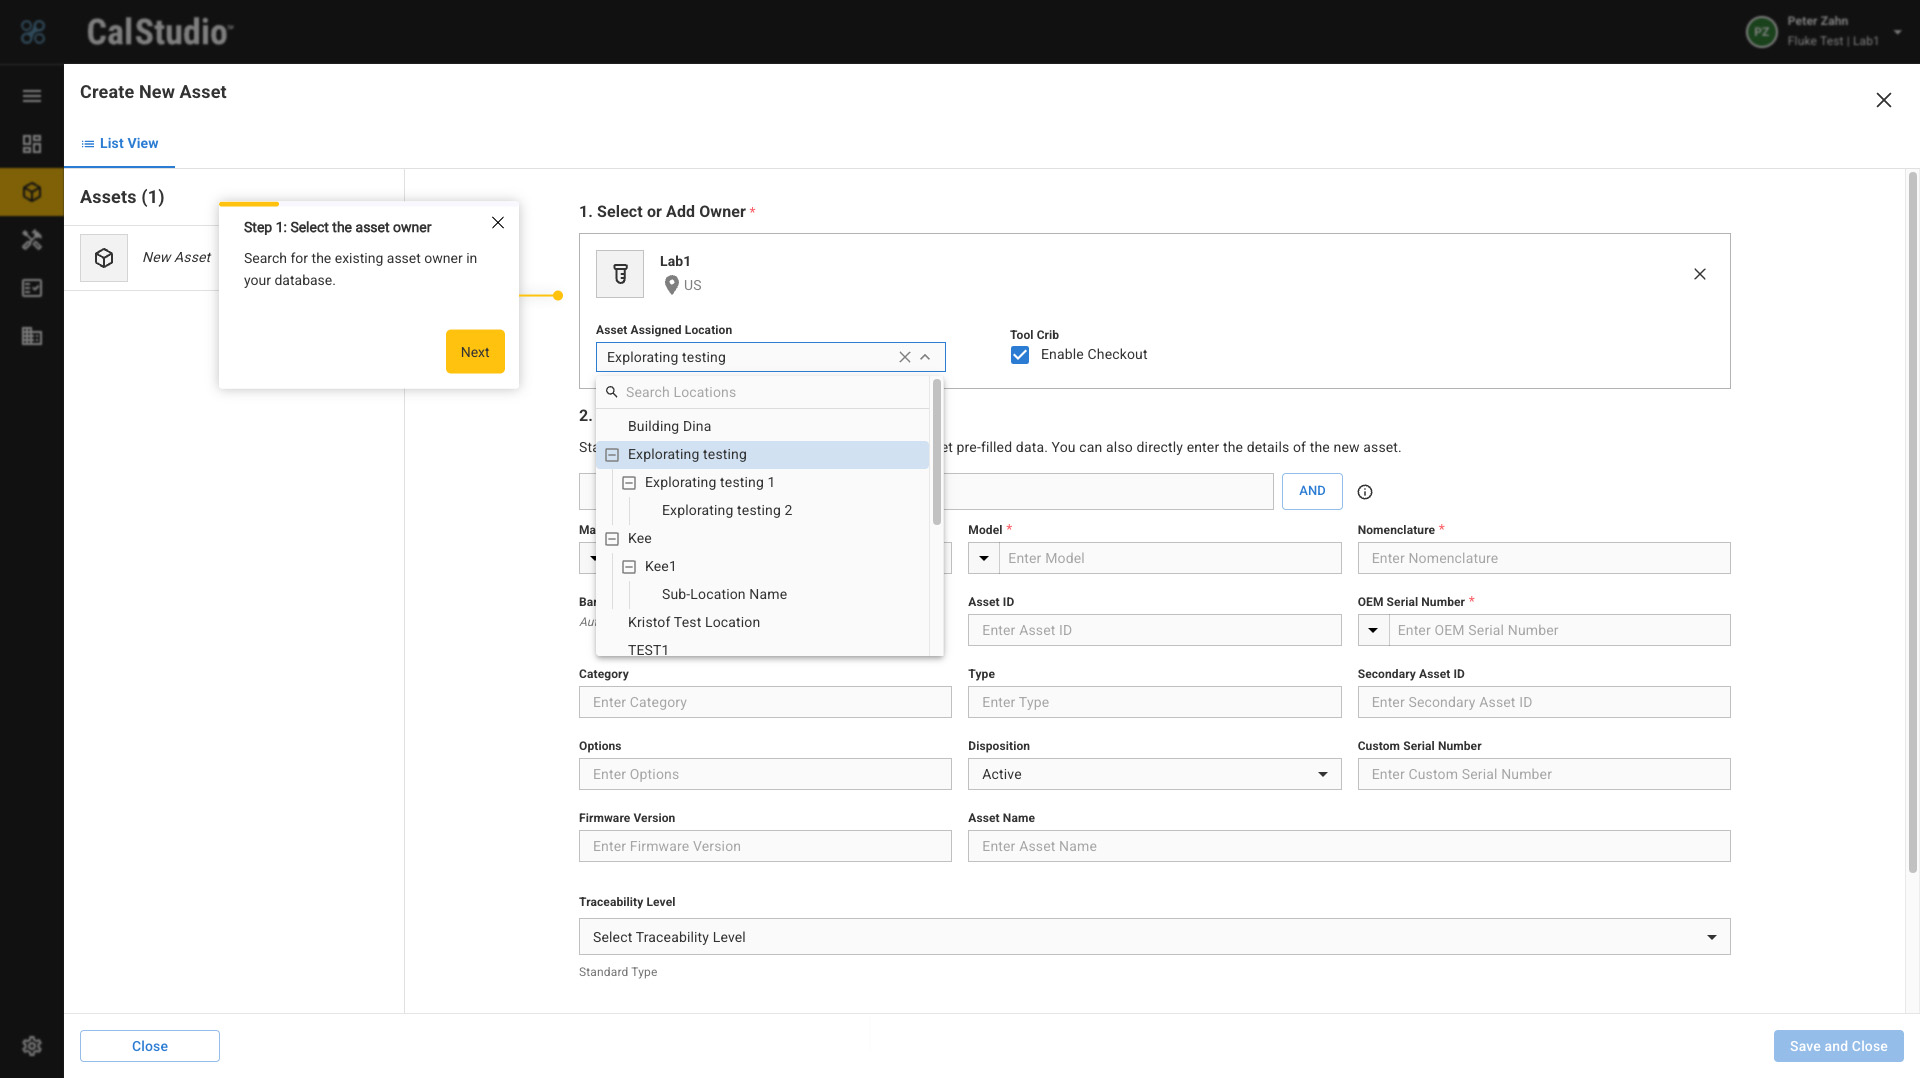
The product catalog has over 800,000 assets. Selecting an asset will automatically populate data fields with standardized naming. You can also add assets manually by typing in the required information.
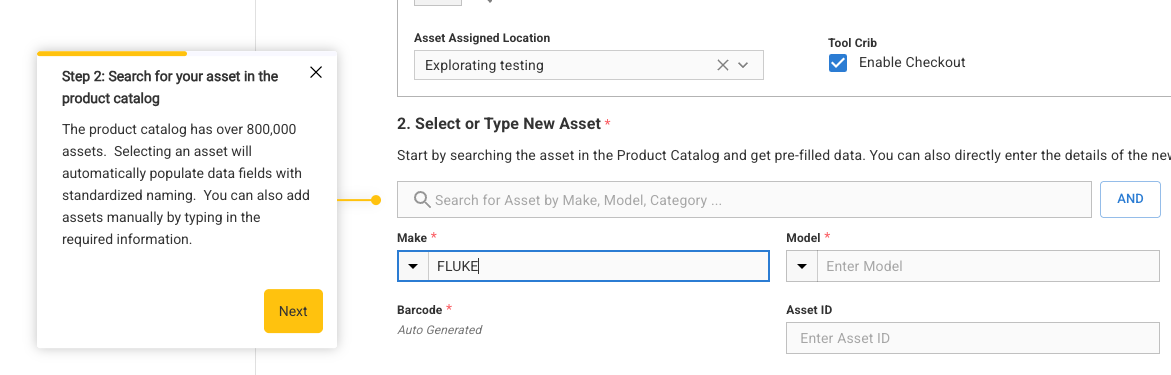
Manual Entry
To manually enter an asset Make/Model, clear the search bar, select whether the asset is known, unknown or custom and enter the information.
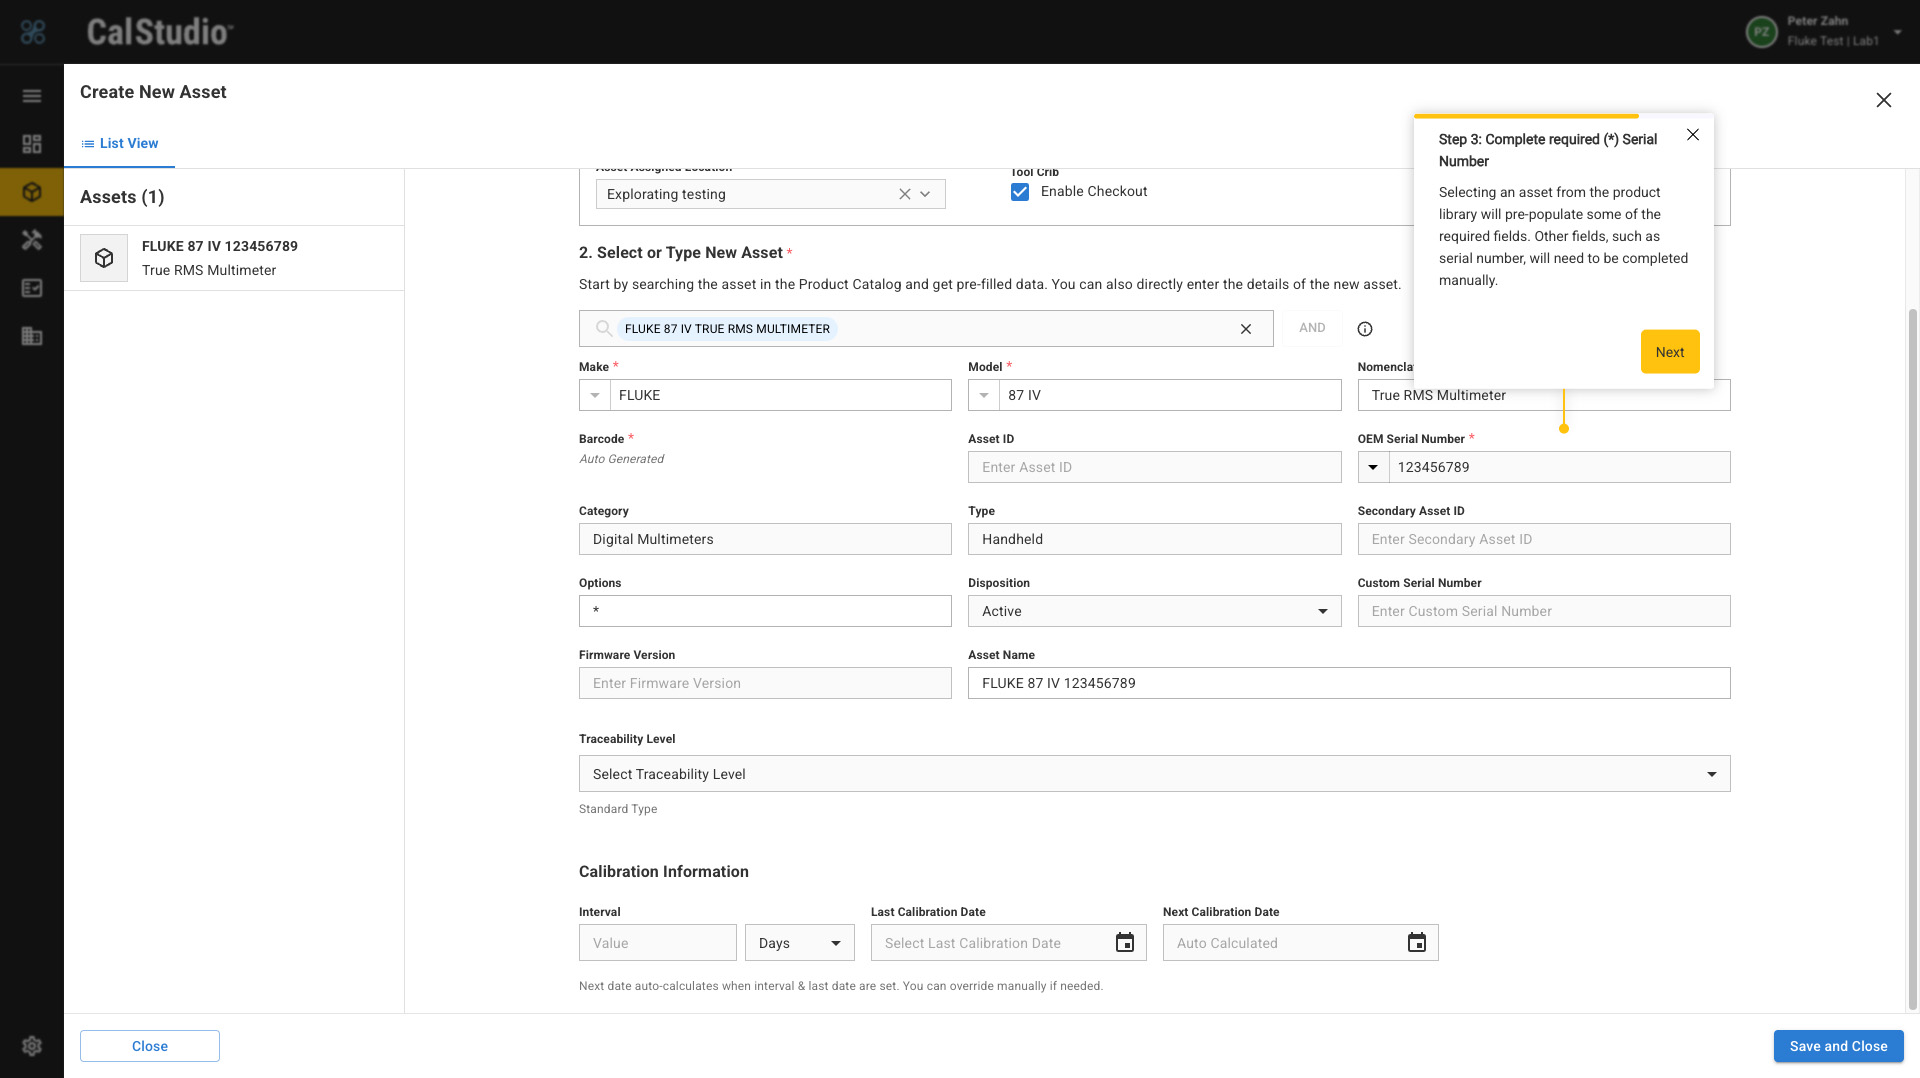
Step 3: Complete required (*) Asset ID
Selecting an asset from the product library will pre-populate some of the required fields. Other fields, such as the Asset ID, will need to be completed manually.
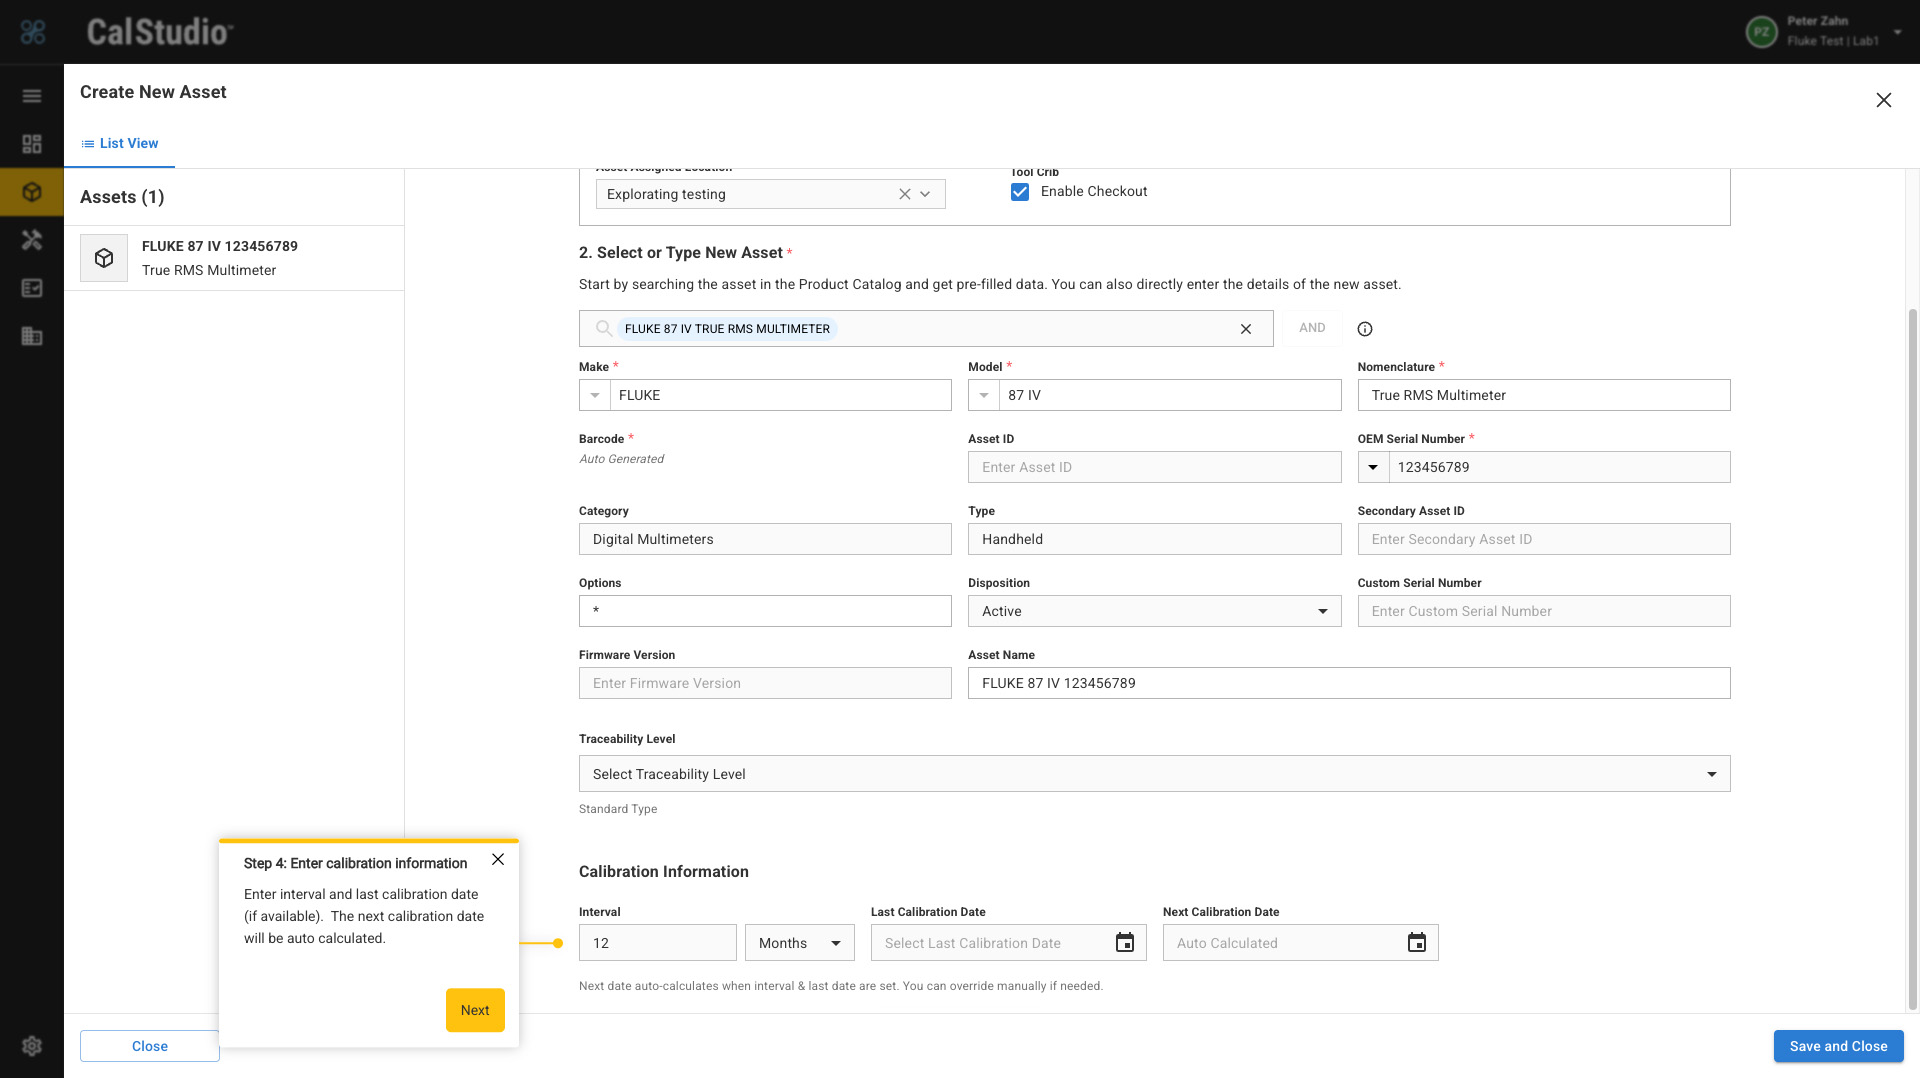
Step 4: Enter calibration information
Enter interval and last calibration date (if available). The next calibration date will be auto calculated.
Step 5: Optionally Save the asset and close
Your asset will be immediately available in the asset list once you have saved. Press the close button to cancel saving and exit.